
Your Cart is Empty


How Motocross Suspension Works - Tuning, Stiffening, Sag, And Cost

The suspension on a motocross bike is one of the components on the bike that takes the greatest beating during a day out on the track. The suspension is crucial system that absorbs the terrain features and keeps your tires in contact with the dirt for better performance and traction. Knowing how to maintain and tune your suspension is an important part of motocross riding!
Tuning the suspension on a motocross bike to the correct sag, compression, and rebound settings is important to ensure optimum comfort and performance of the motorcycle.
The best motocross bike suspension that money can buy will do you and your bike no good unless it is well maintained and tuned properly for the conditions that you will be riding in.

How Do Bike Suspensions Work?
The shock and forks are one of the most important components of a motocross bike. It is what allows you to ride over bumps, jumps, and other obstacles while maintaining control.
Before we dig into the details about the suspension and how it works, there is some terminology around the subject that you need to know about.
- Suspension dampening. Is what controls the rebound and compression of your suspension springs. There are two types of dampening; compression dampening, which works when the suspension is compressed, and rebound dampening, which controls the recoil of the suspension
- Suspension sag. The sag of the suspension is also known as suspension travel. There are two types ofsuspension sag; static sag, also called preload sag, which is the movement of the suspension when supporting the weight of the bike alone, and rider sag, which is the suspension sag when the rider is on the bike in full riding gear.
- Suspension compression. This is how far the front forks and shock compress when the wheels hit a bump.
- Suspension rebound. This is how fast the front fork or the shock recovers from compression and pushes the wheels back into contact with the ground.
- Bottoming out. This is when the suspension uses 100% of it's travel and cannot go any further. The rider feels bottoming out as a jarring hit. Frequent bottoming out can indicate worn-out suspension or poorly adjusted suspension.

How Front Suspension Works On A Motocross Bike
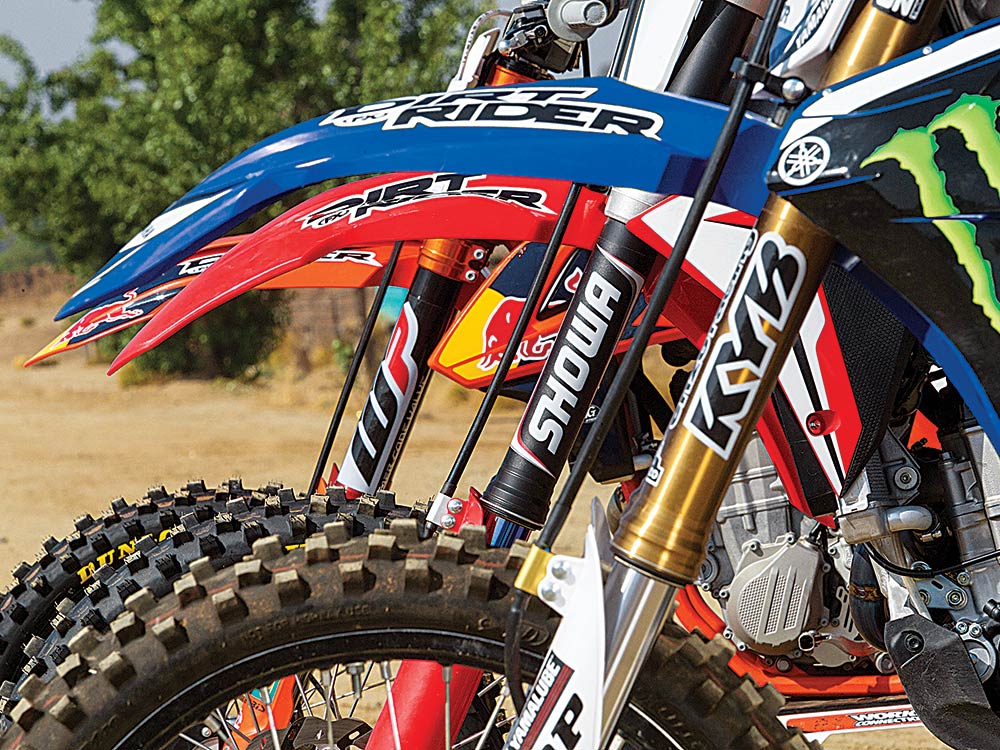
The front suspension on a dirt bike, in fact, on any motorcycle, is in the form of forks. The front forks are what the front wheel is mounted onto.
Essentially, the forks are each made up of two tubes, one that fits inside the other. The tubescontain a spring and a system of hydraulics and valves to control the movement of the spring and provide more dampening. The hydraulic fluid used in the front forks is specific fork oil.
When the front wheel hits a bump or the rider engages the brakes of the motorcycle, thefront forks compress. This compresses the spring, and the rate of compression of the spring is controlled by the hydraulic fluid as it is forced through the compression valves in the fork tube.
After the bump, thesuspension will rebound to push the wheel of the bike back into contact with the ground. The compressed spring provides the force for the rebound, and the force of this rebound is controlled by the hydraulics with the rebound valves inside the tubes.

The combination of the spring, the hydraulics, and the compression and rebound valves dampens the effect of the bumps or rough ground on the bike frame and the rider and also gets the wheel back in contact with the ground as soon as possible.
The compression and rebound can be set on most of the forks to adjust these settings for the type of terrain that you are riding on. If the compression setting is set incorrectly, the forks could bottom out on every major bump, or they could be too stiff and make the ride jarring and uncomfortable for the rider, causing fatigue.
If the decompression setting is not set right, it will not allow the forks to decompress fully before hitting the next bump, causing bottoming out, or it could push the wheel out too fast and make the bike unstable at the front-end.

How The Rear Suspension Works On A Motocross Bike
The rear suspension of a motocross bike works a little differently from the suspension provided by the front forks of the bike.
The rear suspension on a motocross bike is constructed differently from the front suspension in that there are no forks that the wheel is mounted to. The rear of the bike has a swing arm to which the wheel is mounted. The swing-arm is then, in turn, connected to the suspension via a linkage system. The rear suspension consists of a spring and damper, which is usually mounted centrally under the seat of the rider.
Older style bikes had a spring and damper pair, one mounted on either side of the back wheel and connected at the top to the frame of the bike. Some old-school-style road-bikes still employ this method of suspension for the retro look.

The swing-arm pivots up and down as the back wheel moves over the bumps. The up and down motion of the rear wheel and swing-arm is controlled by the rear suspension.
The large spring around the damper is what moves up and down in response to the bumps and rough ground, and the damper, which is basically a hydraulic piston, combined with compression and rebound damper valves, controls the motion of the mainspring.
The piston is filled with oil as the hydraulic fluid, and the fluid, combined with the valves, works in the same manner as the front forks. The pressure of the oil controls the speed at which the spring can compress and rebound, and thisspeed can be adjusted on the suspension to adjust for the type of terrain you are riding or for any additional weight that the bike is carrying.

How Do I Tune My Motocross Suspension?
Tuning the suspension on your motocross bike is a key aspect of getting the best performance out of your bike on a given type of terrain.
The front suspension and the rear suspension will need to be tuned individually for each terrain type that you will encounter on your bike.
Both the front and rear suspension can be adjusted to fine-tune both the compression and the rebound of the suspension, but an important aspect to remember is the tuning between compression and rebound needs to be balanced to get the best performance.
The way that the adjustments are made on the suspension on both ends of the bike is via clickers, which are rotated either clockwise or counter-clockwise to make the adjustment.
Some suspensions require a tool to make the adjustment, such as a screwdriver, but others have a dial that can be turned with your fingers. The mechanism to make the adjustment is termed a clicker because as the adjustment is made, the adjuster will click.
The number of clicks in either direction is how you keep track of the level of adjustment of the suspension.

Keep Track Of Your Suspension Settings
It is a recommendation that you keep track of the settings for both the compression and rebound for both the front and rear suspension. The best way to keep a record of the suspension settings is to keep a notebook where you can document the optimal settings for the locations where you normally ride.
The first time you go to a new riding location, you may need to experiment with the settings to find the optimal adjustments for that location, but once you have it dialed in, youcan make a note of the number of clicks for each of the clickers on the rear and front suspension.
Keeping track of the settings will allow you to pre-adjust your suspension for the terrain the next time you go riding at that location.
Adjusting The Front Suspension On Your Motocross Bike
The adjustments to the front forks of your dirt bike will differ depending on the bike you have and the type of forks installed on the bike. The parts that you will need to adjust are the rebound and compression clickers.
On some bikes, the compression clickers are at the top of the forks and the rebound clickers on the bottom, but on other bikes, this configuration is reversed.
You will need to consult your bike's owner's manual to establish which clicker controls the compression and which one controls the rebound.
The manual will give you the recommended number of clicks to turn the relevant clicker for a certain type of terrain or load that the bike is carrying. If you are unsure where the clickers are currently located, you would have to completely close the clicker and then open it slowly, counting the clicks as you go until you reach the recommended setting according to the manual.
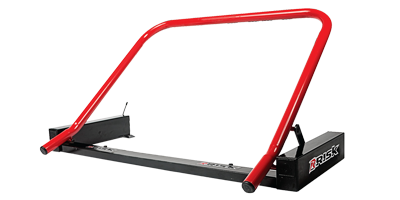
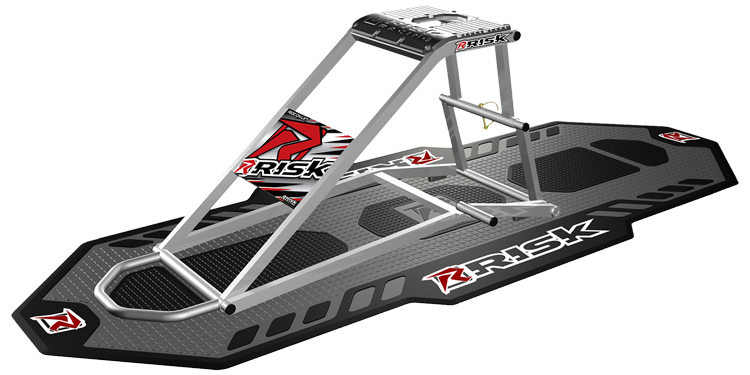
The easiest way to adjust the clickers in the suspension is toget the bike's wheels off the ground to lift the bike up and remove any pressure on the suspension. The best way to do this is to use a quality, easy-to-use,ride-on lift bike stand from Risk Racing!

Once you have adjusted the suspension according to the manual's recommendations for the weight or terrain, you can tweak the settings out at the track to dial it in to the optimal settings for you. Then make a note of these settings in your notebook/notes app and the location to record the optimal suspension settings for that location.
The setting is usually done by turning an adjustment screw at the head or the bottom of the fork with a screwdriver. Some forks have a dial that you can turn by hand without any tools.
Adjusting Custom Motocross Forks
If you have removed the standard factory forks that came with your bike and fitted custom aftermarket forks, you will need to follow the instruction manual that came with your custom suspension.
The settings on the custom forks may not be the same configuration or the same number of clicks as the standard forks that the bike's instruction manual will be referring to.

Adjusting The Rear Suspension Of Your Motocross Bike
Adjusting the rear suspension compression and rebound setting is done in a similar fashion. The construction of the rear suspension is different from the front forks, so don't assume that the settings will be in the same configuration as the front forks.
The bottom of the rear suspension is usually where the clicker of the rebound compression is located, and the compression clickers usually at the top. However, this suspension configuration is not always the case; some models or types of suspensions have the clickers located differently.
Consult your bike's manual to establish which clickers set which aspect of the suspension before going ahead and making adjustments.
The rear suspension may also have two sets of compression adjustments, a high-speed adjustment, and a low-speed adjustment. The low-speed clicker will adjust how the suspension reacts to small bumps such as rocks and small humps. The high-speed adjuster will set the suspension for harder hits to the suspension, such as landing the bike after a big jump.
Place your bike on asolid, safe bike stand and make the base adjustments that are recommended by the bike manual or the suspension manual if it is an after-market suspension.
As with the front suspension, count the clicks and make a note of it. Tweak the suspension when you are out riding and make a note of the setting in your notes so that you can pre-set your suspension before your next ride in that location.

Adjusting Sag On Your Motocross Bike Suspension
The sag on the rear suspension is the amount of travel of the rear suspension when there is no load on the bike compared to carrying the weight of the bike alone and carrying the weight of the bike and rider.
These sag measurements are categorized as follows.
- Unloaded sag. This is the measurement of the suspension when there is no load on the suspension. Both wheels must be off the ground to take this measurement, so the bike will need to be on abike stand.
- Static sag. This is the difference in measurement between the unloaded sag measurement and the measurement when the bike is off the stand, and the suspension is only carrying the weight of the bike. In other words, static sag = unloaded sag measurement – load measurement.
- Rider sag. This is the difference in the measurement of the suspension when the rider is sitting on the bike. In other words, the rider sag = unloaded measurement – loaded measurement with rider on the bike.
Where the measurement is taken is usually from the rear axle of the bike in a vertical line to the bottom of the rear fender. However, the location of measurement can vary from bike to bike, so it is important to consult your bike manual to make sure you measure at the right location.

What Should The Sag Be On A Dirt Bike?
To get the correct sag measurements for your bike, you should consult your user manual for the bike to get the recommended measurements. However, you can use the following as a guideline for general or starting measurements and then tweak them slightly according to your needs.
The general sag measurements by engine size are as follows.
|
Recommended Sag Measurements |
|||
|
50cc – 80cc Engine |
80cc – 100cc Engine |
125cc – 450cc Engine |
|
|
Static Sag |
1-inch to 1.3-inches |
1-inch to 1.3-inches |
1.1-inches to 1.5-inches |
|
Rider Sag |
2.7-inches |
3.1-inches to 3.5-inches |
4-inches to 4.2-inches |
How To Adjust The Sag On Your Motocross Bike
To adjust the sag measurement on the rear suspension of your dirt bike, there are usually two nuts at the base of the suspension; one lock nut and one adjusting nut.
The top nut is usually the lock nut, and you may need to knock it loose with a hammer and a punch. This will be released by turning it in a counter-clockwise direction.
Once the lock nut is loose, you can adjust the bottom sag adjuster nut, which will change the sag measurement. Turning the nut counter-clockwise will increase the sag height, and turning it clockwise will decrease the sag height.
Adjust the nut until the desired sag measurement is reached, and then tighten the lock nut down to keep the adjustment nut in place.

How Do You Stiffen A Dirt Bike Suspension?
The need to stiffen your dirt bike's suspension is not a matter of making one adjustment. Stiffening the front suspension will make the bike perform differently than stiffening the rear suspension.
To stiffen a dirt bike suspension, you can adjust the compression and rebound clickers on the forks and swing arm to firm up the overall feel of the ride. If you firm up the suspension too much, the bike may become uncomfortable to ride on rough terrain, and you could compromise the traction ability.
You can also make changes to the compression or rebound settings in isolation. It is highly probable that you would need to make adjustments to both settings to tune the suspension to what feels the best for you, depending on the terrain.
How Much Does It Cost To Have Your Dirt Bike Suspension Done?
There are some general care and maintenance tasks that you can perform on your forks and suspension to keep them functioning well, such as using theRisk Racing Fork Seal Doctor, but at some point, you will require someprofessional servicing done on the suspension.
The front forks are the ones that usually require the most frequent maintenance. The rear suspension can take much more punishment before requiring attention.
For service of the front forks, which would include the replacement of oil and seals and checking parts for wear, you can expect to pay $100 to $150 per pair.
Performing a re-valve and service, you wouldprobably be looking at a total cost of $250 to $300 for the pair of front shocks.
If you need to rebuild your forks with custom springs and valves for additional performance or to handle more weight, the cost could be more in the region of $500 to $700 for this kind of custom work.
Service on a rear suspension will cost you $100 to $150; even though it is a single unit, it is more complex to work on than the front forks.

Conclusion
The suspension on your motocross bike is what keeps your wheels firmly in contact with the ground. You cannot go faster or pass rivals on the track if your wheels are not making proper contact with the ground and gaining maximum traction.
This is why many pro riders focus a lot of attention on dialing in their suspension to optimum levels for both the terrain and the weight of the rider to get the maximum performance out of the bike.
Adjusting the suspension is not difficult, and trying a few different settings out on your bike could improve the quality of the ride you get out of the bike and make your day out at the track more enjoyable and more successful!
Leave a comment
Comments will be approved before showing up.
Join the Risk Racing Community
Be in the know! Subscribe for exclusive offers, product launches, and insider tips. Don't miss out!
Email Sign Up Text Msg Sign Up